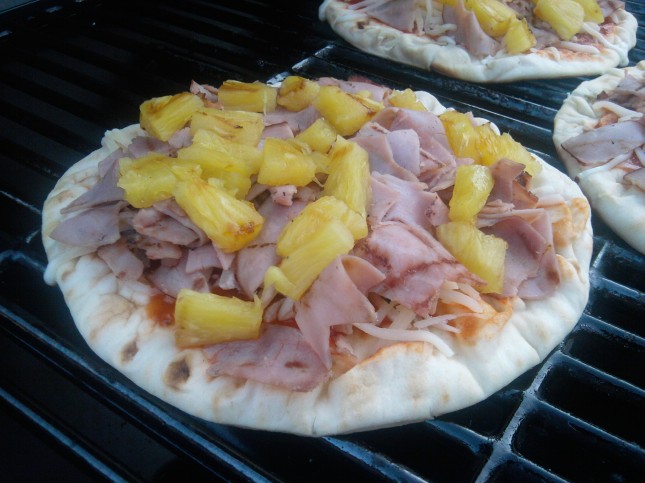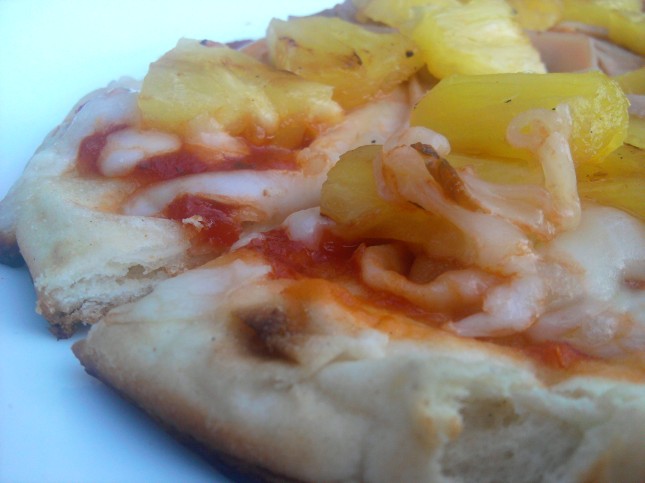
Flat bread is such a great platform for pizza. It offers a crispy yet chewy crust, and the toppings are endless. Tonight we decided on Hawaiian pizza. I used store bought flat bread since I was crunched for time. However, if you have time, this recipe is simple enough, and you can switch out the thyme for an herb (or several) of your choice.
For the sauce, combine 3/4 cup of tomato sauce, and 1 Tablespoon honey barbeque sauce. Stir to combine. (This makes enough for about 6 flat breads – depending on how much sauce you like)
I grilled the pineapple slices, and ham before topping the pizzas. The grill caramelizes the sugar in the pineapple, making it amazingly sweet and juicy. I used maple ham and grilled it for about 2 minutes on each side. The pineapple took about 3 minutes per side at 400 degrees.
Slice the ham and pineapple into bite sized pieces.
Spread desired amount of sauce on each pizza, top with freshly grated mozzarella cheese. Finish with ham and pineapple.
Grill at 400 degrees for about 6 minutes, or until cheese is melted and crust is crispy.

Tags: Cooking, flat bread, food, grilling, pizza, Recipes
We have been trying to have stay at home “date night” a few times a week. This enables us to have uninterrupted conversation, and some much needed us time,(after certain little people go to bed) without spending ridiculous amounts of money on meals that are just mediocre.
I have been craving grilled corn on the cob since Rufus’ Food and Spirits Guide posted this wonderful how – to.
If you have not yet been to this wonderful blog, full of fantastic recipes for both food and drink, I highly recommend that you do. This husband and wife blogging powerhouse offer an array of tantalizing recipes that they capture with amazing photographs.
Tonight’s date night seemed like the perfect time to satisfy the corn craving.

Before grilling, rubbed with butter and re-wrapped
And what better to go with grilled corn than crab cakes, baseball on the radio, cold beer and eating under the stars.
Crab Cakes
( You can use fresh or canned crab – I used canned tonight because the store did not have any fresh crab – sigh)
Ingredients – yield 6
4 (6oz) cans crab meat
1 yellow bell pepper, finely diced
1 eggs slightly beaten
1 Tablespoon parsley
1/2 teaspoon hot sauce
juice from half lemon
1 Tablespoon spicy brown mustard
2 Tablespoons mayo (I use olive oil mayonnaise)
1 cup bread crumbs
Directions
Combine all ingredients in a large bowl, mixing well to combine all ingredients. Form into patties, about 3/4 inch thick. Let rest in refrigerator at least 20 minutes before grilling.
Preheat grill to 400 degrees, and cook cakes 4 minutes per side.
Corn takes about 10-15 minutes to cook, click here for instructions.
Lemon Aioli
Ingredients
1/2 cup mayonnaise
1 clove garlic, minced
1 tablespoon chopped chives
3 tablespoons lemon juice
1/2 teaspoon lemon zest
salt and freshly ground black pepper to taste
Directions
In a medium bowl, mix all the ingredients together.
Grilled Garlic Bread
Baguette bread
Olive oil
Clove of garlic, peeled
Directions
Cut bread into 3 inch long sections, slice in half. Brush with olive oil, and place on grill – about 3- 4 minutes. Remove from grill and rub toasted side with garlic clove.

Yes, the quality of this photo is awful, but I did not want to wait to eat, and would have had to go inside to take a better picture. But you get the idea!
Tags: Cooking, corn on the cob, crab cakes, food, grilling, Recipes
 I was talking about hamburgers with a friend recently, and when she said how can anybody mess up making a burger, it got me thinking. There are many ways to ruin a perfectly good burger. When I had my restaurant, our burgers were one of our best sellers. People would ask how I got them so juicy, and big. We used locally grown, organic black Angus beef that was delivered every other day, and I think that while this added to the flavor, one can achieve a fantastic burger with regular store bought ground beef. Here are several “rules” I follow, and my results are the same every time. Thick and juicy. I thought I would share them, since we are now officially in the grilling season.
Rule #1 – Always use a good lean- to – fat ratio. 80 / 20 is perfect. The fat provides optimal flavor.
Rule #2 – Do not over handle your meat. People tend to try to get the perfectly round patty, and do not realize that all they are creating is a tough, juice-less burger instead. All you need to do is grab a good sized handful, (about the size of a baseball) and press lightly into the palm of your hand, gently shaping into a disc about 3/4 inch thick. That’s it. It does not need to be a perfect circle.
Rule #3 – Salt. And a good amount of it. Salt both sides of the burger, about 1/2 tsp per side, and then more before serving. The salt allows the meat to get a good crust while cooking, either in a pan or on the grill.
Rule #4 – Never, ever press down on the burgers while they are cooking. You may think this will help it cook faster, but it does not and all your really doing is pressing all those beautiful juices and flavors right out of the burger. The only time they need to be touched is when you are flipping them. And this only needs to be done once. I cook my burgers 5 minutes per side. Do not overcook. 4-5 minutes per side at 375 – 400 degrees is plenty of time to insure your burger is cooked to perfection. (medium)
and last but not least….
Rule #5 – Let the burgers rest a few minutes before taking that first bite. This allows all of the juices to remain in the meat, and not all over your bun.
Follow these tips, and you will be the burger king or queen! (pun intended)
Now on to the cookie recipe for today.( I found the recipe here )
I missed last week of the cookie project so this week I am going to try and double up. Here is the second attempt at figuring out the secret cookie. Still not it, but darn good! We made some this afternoon in between our Slip and Slide adventures outside.
Brown Sugar Chocolate Chip Cookies
Ingredients
1 cup (2 sticks) butter, softened
1 1/2 cups brown sugar
2 eggs
2 tsp vanilla
3 cups flour
3/4 teaspoon Kosher salt
1 teaspoon baking soda
1 cup semisweet or milk chocolate chips (I used half semisweet and half milk chocolate)
Directions
Heat oven to 350 degrees.
Mix flour, salt, and baking soda together in medium bowl; set aside.
Beat the butter and brown sugar until thoroughly blended. Add eggs, and vanilla and mix to combine. Add dry ingredients and mix just to blend. Gently fold in chips.
Place dough onto parchment paper-lined cookie sheet using a scooper.
Bake 10-12 minutes (depending on the size of your cookies and your oven) or until cookies are pale brown.
Cool cookies on cookie sheets for 5 minutes. Transfer to cooling rack until cooled completely.

My partner in cookie crime
Tags: Baking, burgers, cookies, Cooking, food, grilling, Recipes, summer, tips on making burgers


